This post focuses (literally) on a technical aspect of photography, not so much on the photos themselves. So, if you’re not interested in reading about focus blending, please skip ahead to the photos.
One of the challenges of landscape photography is achieving sharp focus for the entire depth of the scene. A landscape photograph is a two dimensional portrayal of a scene which has three dimensions including depth. Depth can be several kilometers in the case of a mountain scene, for example. Camera lenses by their nature are limited in the depth of a scene they can capture in focus. Depth of field is the term for distance into the scene that is in focus in the photograph. Depth of field varies with the size of the aperture (lens opening) being used. A large aperture, f2.8 for example will have a very shallow depth of field and is not very suitable for landscape photography. A smaller aperture, f32.0 for example provides much greater depth of field and would give sharp focus for the entire depth of the scene. Unfortunately, lenses lose overall sharpness as the aperture becomes smaller, so the obvious answer is not to minimize the aperture setting. Lenses are generally sharpest in the middle range of aperture settings, f8.0 to f11.0. So the challenge is to find the best balance between overall sharpness and depth of field.
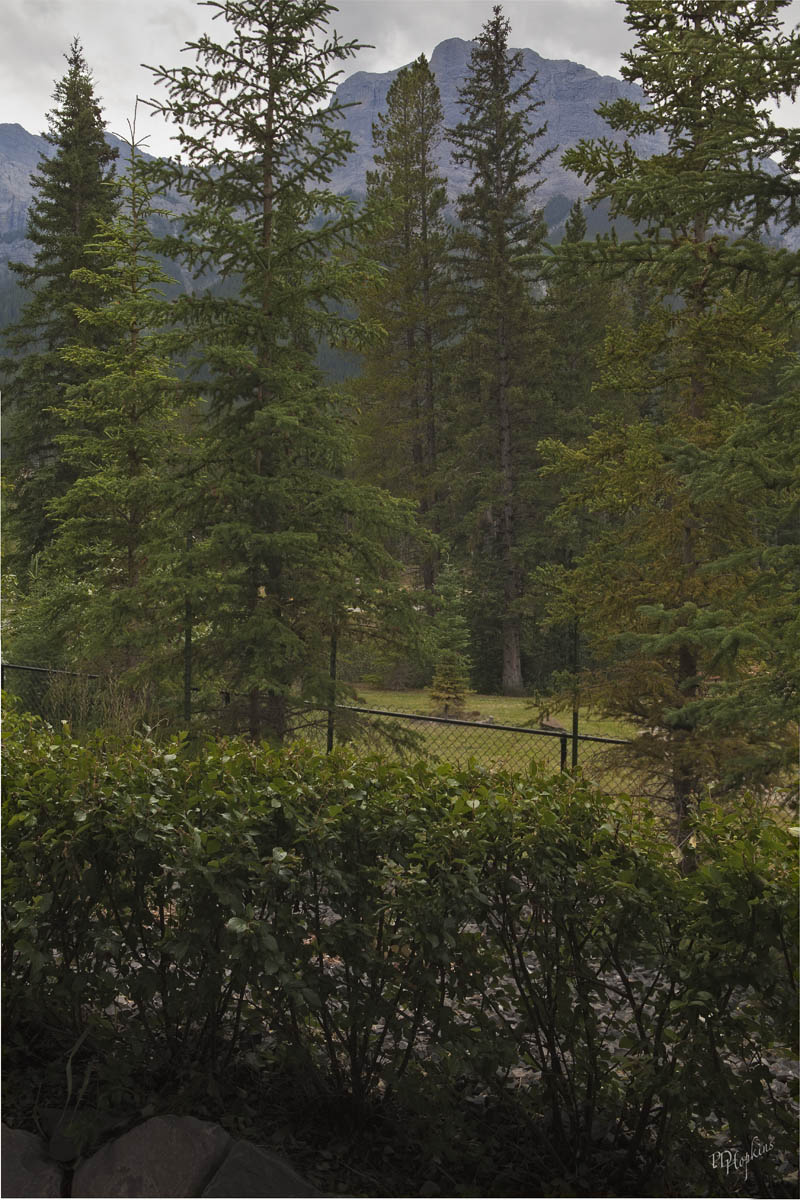
I recently discovered a technique termed “focus blending” to address this challenge. The approach is to take three or four seemingly identical images. The composition and exposure are identical but the camera is focused in a different place in each of the shots. The result is multiple images, each with sharpest focus in a different area of the photo. These images can then be overlaid and blended, overlapping their respective depths of field to produce a single image with sharp focus throughout.
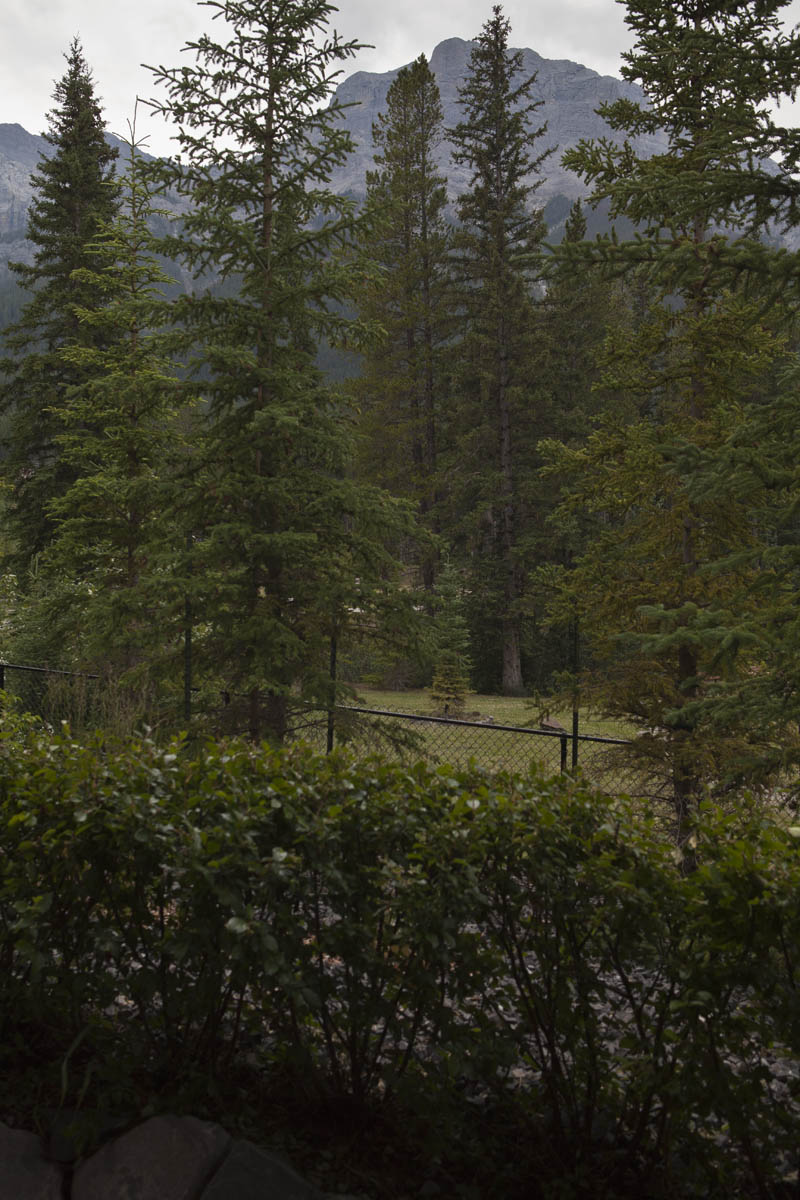
I took three photos from our backyard in Canmore. The scene encompasses a great depth, from the hedge in the foreground to the mountain in the background. In all cases, the aperture was f9.0. If you look carefully at this first image, you’ll see that the hedge is not very well focused. That is because the camera was focused on the mountain peak in the background. Depth of field was insufficient to allow good focus of the hedge.

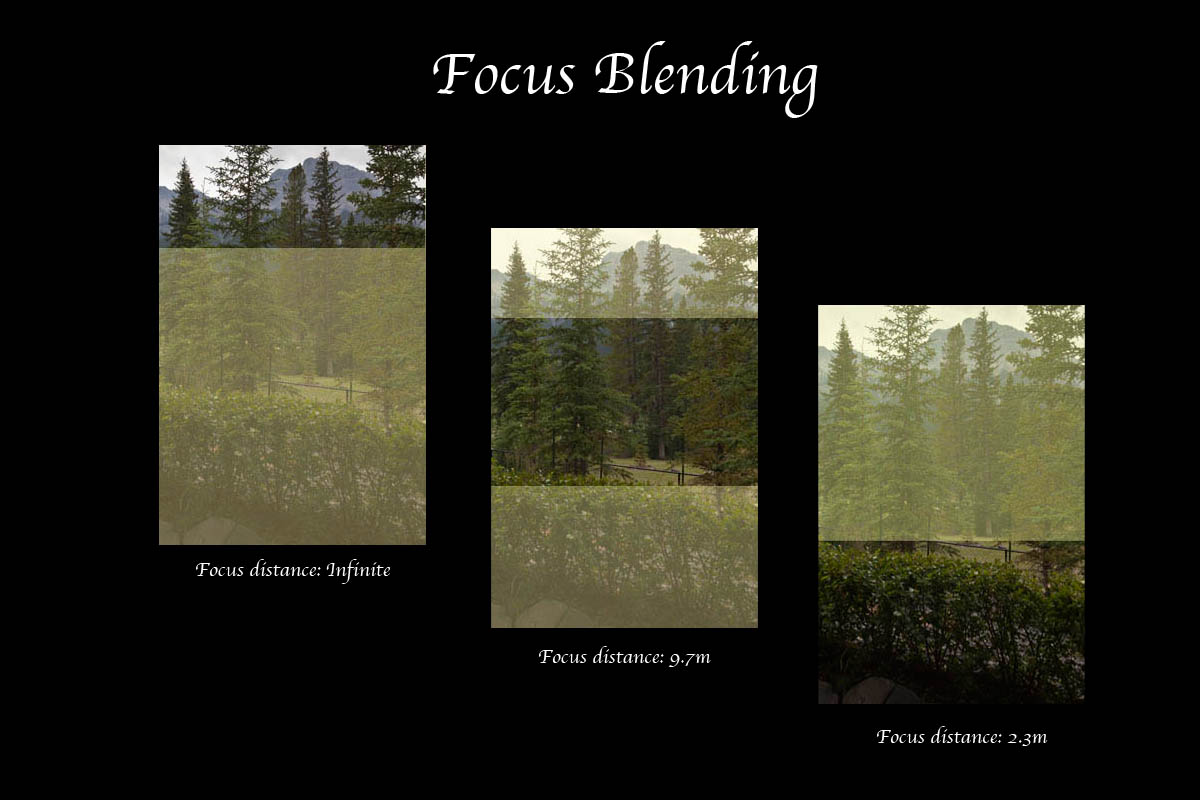
The following graphic shows the areas of each photo that are the best focused. The first is focused on the mountain and consequently the upper third of the photo (excluding the tree tops) is in good focus. The second photo is focused on the small tree in the middle of the scene, so the middle third is in good focus. The last photo is focused on the hedge in the foreground so the lower area is well focused.

Using Photoshop CS5, I was able to overlay these three images in separate layers. Beginning at the top, it is then a matter of carefully erasing those areas of each image that are not in the best focus (ie. those areas highlighted in yellow). The erased areas are transparent and allow the underlying layers to show through. With the layers stacked beginning with the image on the left, the remaining areas of each layer combine to form the final image, in focus from top to bottom.

My thanks to Howard Dingle for pointing me to this very useful technique.

Neat!! How did we ever get along without digital photography!! Nice job!