A technique I’m working on is expanding the dynamic range of my photographs. In photography dynamic range can be interpreted as the measurement between the whitest whites and the blackest blacks in an image, or the lowest and highest values of density and luminance. Image sensors in cameras do not have the dynamic range of the human eye.
Furthermore, any given image can have less dynamic range than the sensor can capture. Consider the full tonal gradient from the blackest black to the whitest white. There is a huge range of grey in between (not unlike life!). Think of the dynamic range of an over-exposed image as that area enclosed by the red rectangle. An under-exposed image would cover an area of the gradient as represented by the green rectangle. The dynamic range of a balanced image might straddle an area bounded by the yellow rectangle but not capture the extremes of the entire gradient.

The goal is to expand the range of a balanced exposure, in other words, widen the yellow rectangle. The way to do that is to take multiple exposures at different levels of luminosity and combine them into a single image that covers a much greater dynamic range.
Following are a couple of photographs with greater dynamic range than any of their component images. I took three exposures of each scene, roughly 1 f-stop apart. I then combined them, selecting only those areas of the component images I wanted to appear in the final photograph. I could have further expanded the range by using more images and increasing the gap (number of f-stops) between each image. With 5 or more images, I’d likely still be working on it.
This photograph was taken just before the moon set and the sun rose. The dynamic range is better than any of its three component images and what you see more closely approximates what I actually saw when I took the pictures. For example, the bush in the foreground was pretty much what I could see. I had to over-expose one of the component images to get it that bright. Similarly, I had to under-expose another of the images to capture the moon and the colour in the sky, which weren’t visible in the other two images.

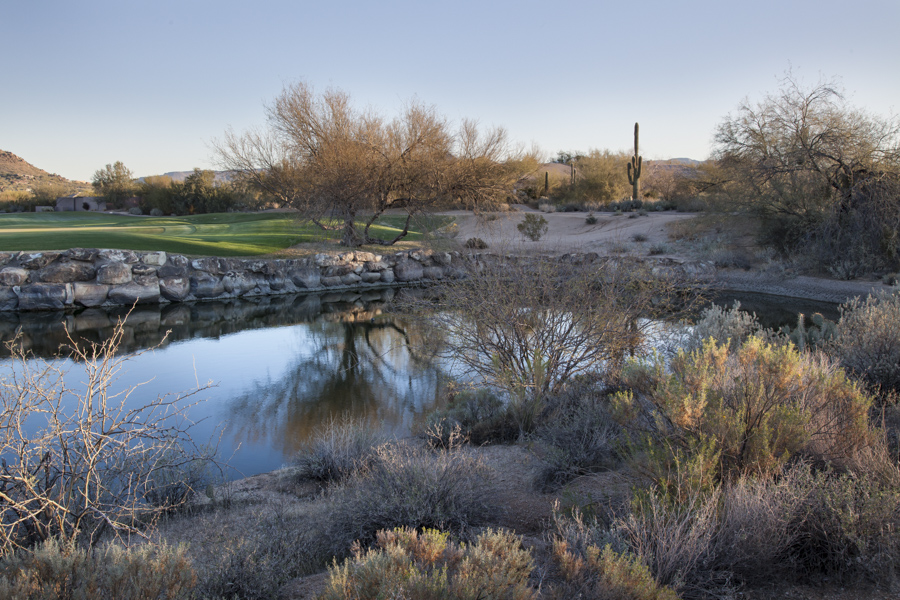
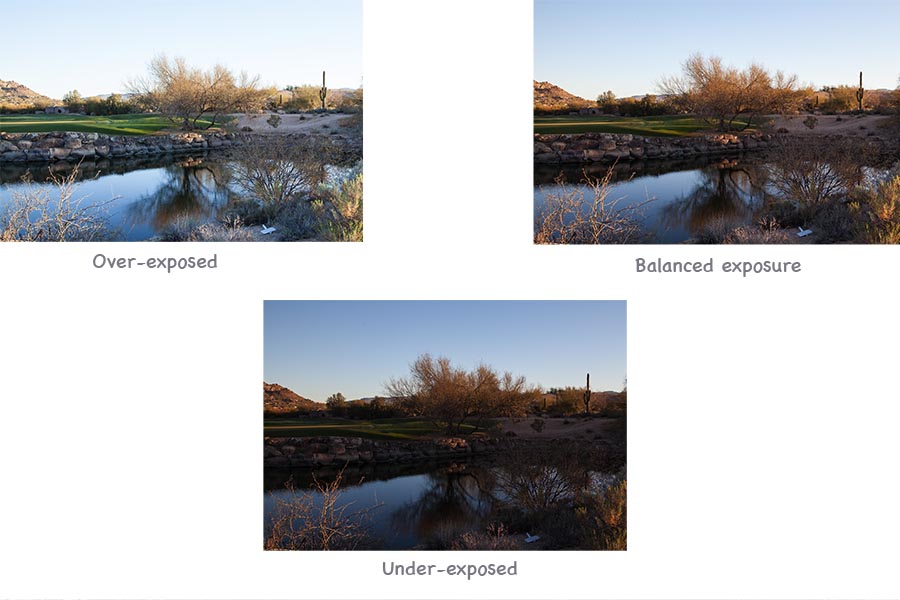
This last photograph is comprised of images shot about 25 minutes later, after the sun had risen. The sun is still low in the sky and you can see where light is shining through openings in the trees behind me. The lightest image was over-exposed and enabled me to better bring out the brightest parts of the picture; the foreground, the tree and rock across the pond and parts of the green . The second lightest image was well exposed but still quite dark in many areas. I used parts of it to strengthen colour in the foreground. The darkest exposure was the only one with the sky sufficiently exposed and it completes the upper part of the picture. It was too dark for any of that exposure to be used elsewhere in the final picture.

Here are the three component images I used to create the single photograph above.

You could create a reasonably balance image with any of them, using Lightroom or Photoshop developing software. You would be limited to a smaller dynamic range than can be achieved by using elements of all three exposures in a final picture. Photography is about capturing the best light you can. Greater dynamic range provides a better selection of light to work with.

Enjoyed the classroom …but love the reflections 🙂 🙂 🙂
Helen
Aloha!
Very interesting!
This will sure keep your mind Sharp!!
Shadows and reflections are well defined!
Hugs,
Nancy
Very good photos and interesting about light values