
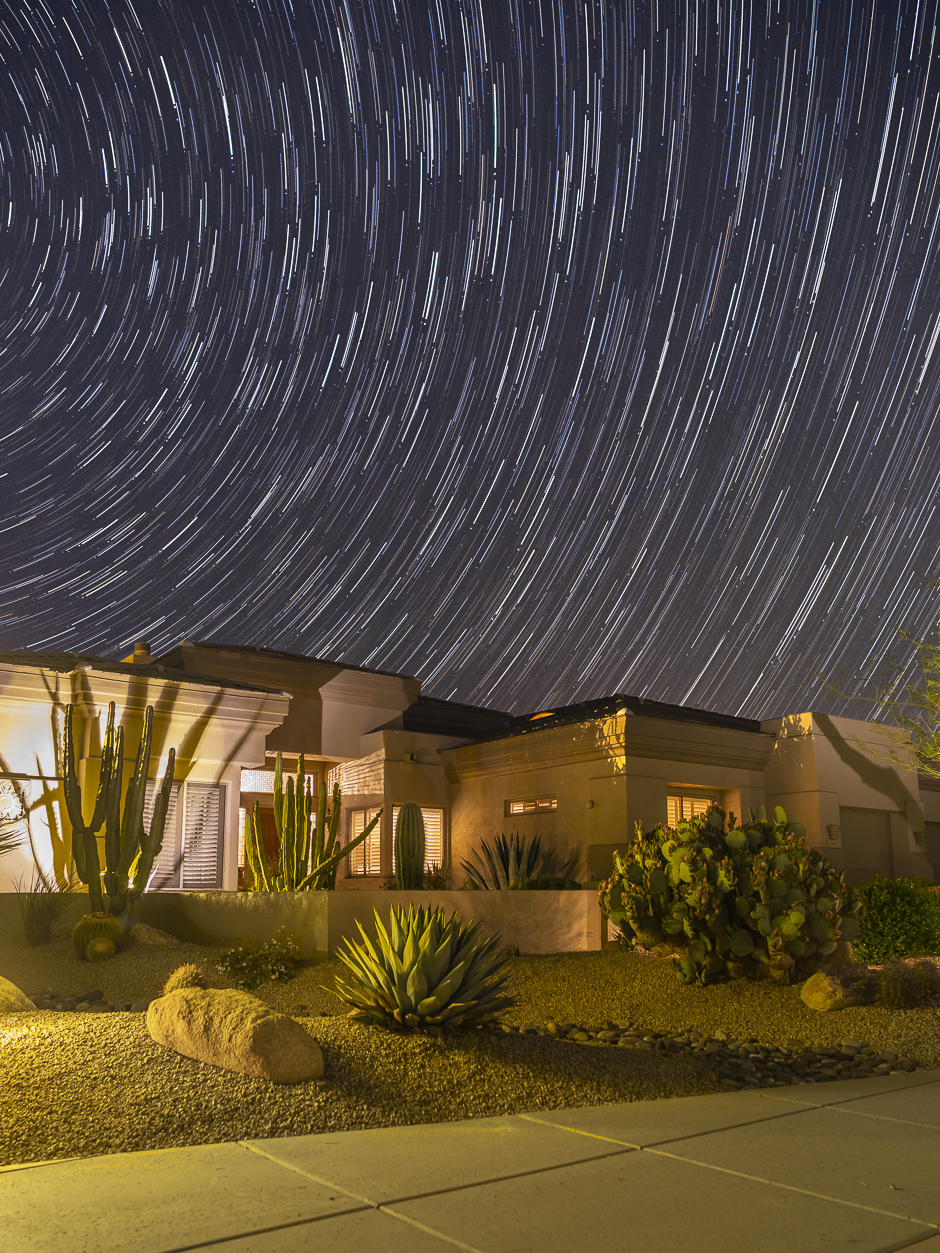
Today I have one photograph only for you. It’s a little unusual but I think it’s an interesting and striking photograph. What you are seeing are called “star trails”. The stars are relatively stationary for the duration of taking the photograph. But, the earth rotates and so the camera is moving, describing a circular path around the earth’s axis. Consequently the stars in the sky appear as streaks rather than dots and may create the impression they are traveling around the earth. Read on if you’d like to know how this photograph was taken.
Boredom Alert: Proceed with caution
There are actually one hundred photographs combined to produce this image. The first one is pretty straightforward, simply a photograph of the house. The original photograph looks very much like this but for the sky; the stars appear as original dots rather than streaks. The picture was taken with an exposure of 14 sec, an aperture of f/8.0 and an ISO setting of 250. The earth doesn’t move enough in 14 seconds to visibly streak the stars!
I put on some inside lights and all the landscaping lights, supplemented with some light painting to help with the exposure.
For the remaining 99 shots, I shut off all the lights and basically operated in the dark. Each image showed only the stars and a dark outline of the house. I used an intervalometer to trigger the camera shutter, again every 14 seconds, with an interval of 1.0 second between pictures. I opened the aperture to f/1.4 to better capture the faint light of the stars and was able to keep the ISO setting at 250. Twenty-five minutes later, the camera stopped shooting and I called it a day (a night?)
To produce a single photograph, I loaded all 100 images into Lightroom. I performed some basic adjustments to the single foreground picture and to the first of the 99 sky shots. I then synchronized the remainder of the sky shots with the first to make them identical, except for the location of the stars which had changed with each frame.
I exported all the images as layers in Photoshop, with the foreground picture atop the stack and the remaining images in chronological sequence. I checked the alignment and proceeded to blend the images. To do that, I simply changed the blend mode of every image from “Normal” to “Lighten”. The Lighten Blending Mode takes a look at the base colour and the blend colour, and it keeps whichever one of the two is the lightest. The base colour on each image is dark (blue) and the blend colour is light (white). Only the white shows through. Because the “Lighten”blend mode is applied to every layer, the light colour shows through every layer accumulating to create streaks at the top layer, the foreground layer. The dark, foreground area of the 99 preceding layers doesn’t show through and only the foreground in the top layer is visible.
As a last step, I flattened the layers and made some minor adjustments to the overall composite picture.